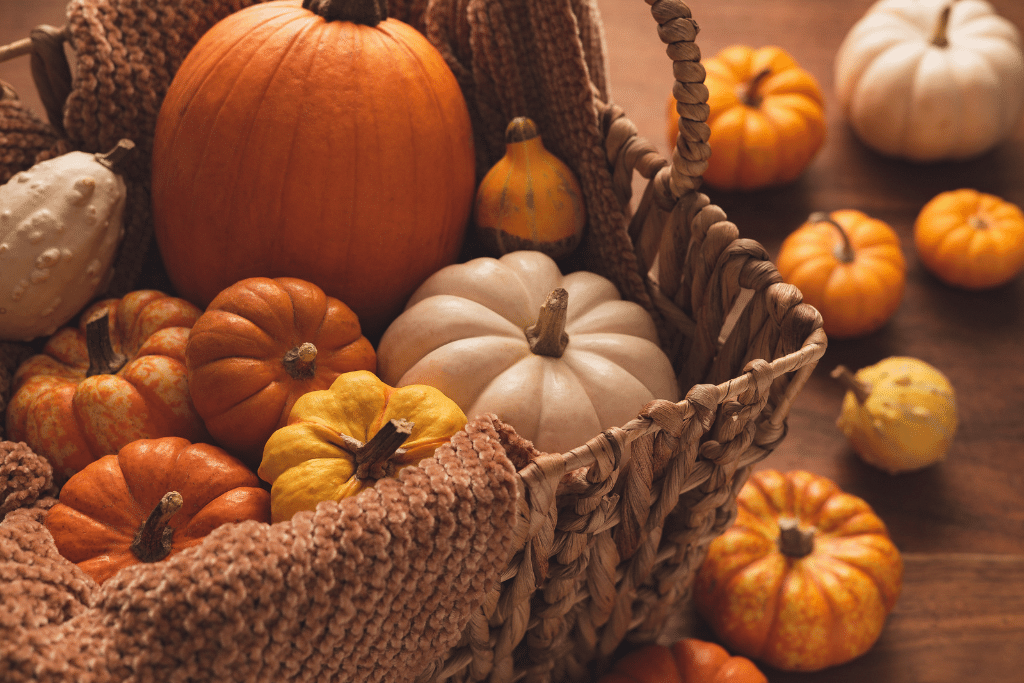
What do October, orange and round shapes have in common? Halloween! Pumpkins are one of the most iconic symbols of fall, with their vibrant orange color and round shape. But have you ever wondered how these large fruits come to be? It all starts with a small seed which is then planted in the ground. This marks the beginning of a pumpkin’s journey through different growing stages, each with its own unique characteristics and requirements.
Cultivating pumpkins is a delightful experience for people of all ages, especially during the Halloween season when they become a symbol of the holiday. They can be used for decorating, carving into jack-o-lanterns, or transforming into delicious pies and various meals.
To ensure a bountiful harvest, it is essential to understand the various stages of pumpkin growth and provide appropriate care throughout the process.
So, without ado, let’s have a look at the detailed overview of the pumpkin growing stages.
Quick Overview And the 9 Pumpkin Growing Stages
| Stage | Description |
| Planting | Sow pumpkin seeds in nutrient-rich soil with adequate sunlight, spacing them 2-3 feet apart after the last frost. |
| Germination And Sprouts | Pumpkin sprouts emerge within 7-10 days under optimal soil temperatures of 70°F (21°C). |
| Seedlings And True Leaves | True leaves appear, taking over photosynthesis from cotyledons. |
| Vine Growth | Main and secondary vines develop, requiring space and balanced fertilizer. |
| Flower Blossom And Pollination | Male and female flowers emerge, pollinated by bees or manually with a brush. |
| Fruit Development | Proper watering and pest management ensure healthy pumpkin growth and maturation. |
| Harvesting | Pick pumpkins when the rind is hard, the stem is dry, and the color has developed. |
| Curing And Storage | Cure pumpkins at 75-85°F (24-29°C) for 10-14 days, then store at 50-55°F (10-13°C) in a cool, dark, well-ventilated area. |
Now, let’s explore each of these pumpkin growing stages in more detail.
1. Germination – Planting Pumpkin Seeds For a Successful Start
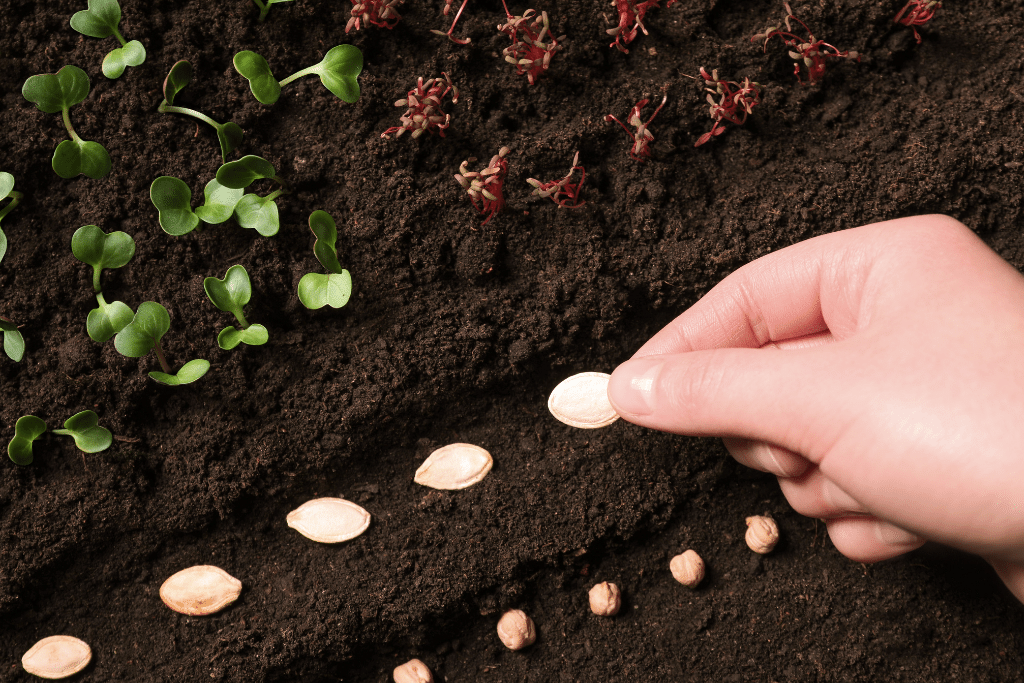
The pumpkin growing journey begins with germination, the process of planting pumpkin seeds under the right conditions. To provide your seeds with the best start, ensure you plant them in nutrient-rich soil enriched with compost and manure. This soil combination not only provides essential nutrients but also helps retain moisture and improve soil structure.
Timing is critical when planting pumpkin seeds. It is advisable to sow them in a sunny location after the last frost, which typically occurs in late May or early June, depending on your region. Planting too early can expose the seeds to frost damage, while planting too late can shorten the growing season.
Soil temperature plays a significant role in successful germination. Pumpkin seeds thrive when the soil temperature is around 70°F (21°C), encouraging robust and consistent growth. You can use a soil thermometer or rely on the average daily air temperature as a general guideline.
When sowing pumpkin seeds, consider the space they need for their vigorous growth. Plant the seeds about 1 inch deep to protect them while allowing seedlings to emerge. Spacing the seeds 2 to 3 feet apart will prevent overcrowding, which can lead to diseases and nutrient competition.
Companion Planting
Before planting your pumpkins, it’s beneficial to plan your garden and include companion plants. Certain plants near your pumpkins can improve growth, repel pests, and enhance soil health. Effective companion plants for pumpkins include:
- Corn: Provides natural shade and support for pumpkin vines while repelling cucumber beetles.
- Beans: Fix nitrogen in the soil, benefiting pumpkins and other plants.
- Nasturtiums: Attract beneficial insects and repel squash bugs and beetles.
- Marigolds: Release chemicals that deter nematodes and other pests from attacking pumpkin roots.
Explore the companion planting pumpkins in detail.
2. Sprouts: Cotyledons & Early Care
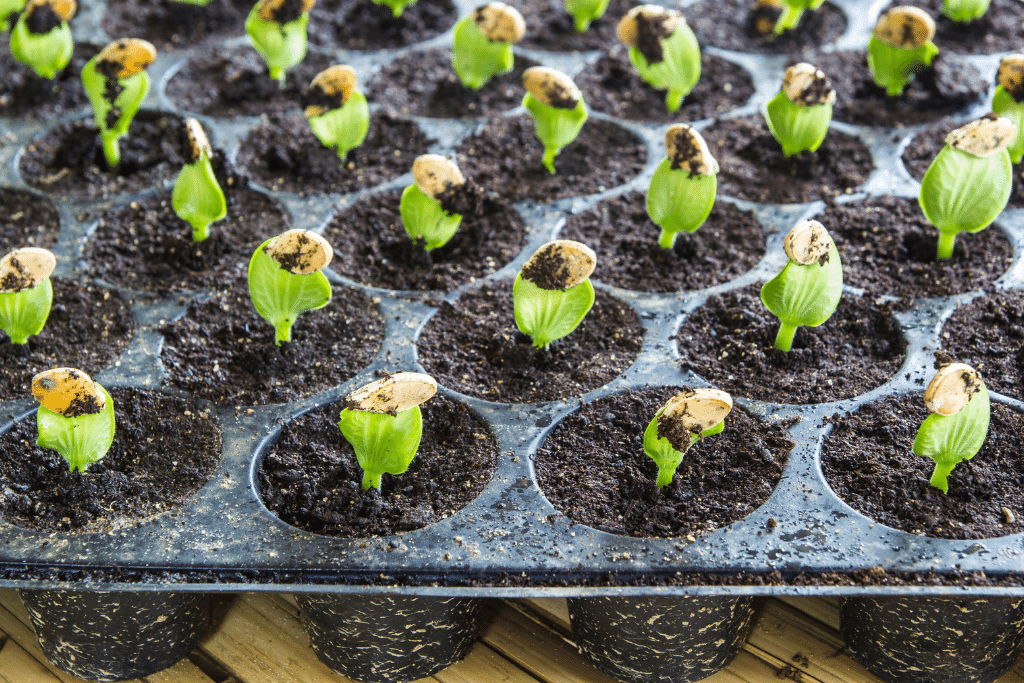
Following the planting of pumpkin seeds, the next stage involves the emergence of sprouts. Within 7 to 10 days, pumpkin seeds will start to sprout, pushing through the soil to reveal the first set of leaves, called cotyledons. These initial leaves are essential for the early development of the pumpkin plant.
Cotyledons serve as the seedlings’ food source, containing chlorophyll, and are responsible for photosynthesis, providing the necessary nutrients for strong, healthy growth. As the plant matures, it will produce the first true leaves, which continue to generate energy for the plant.
Maintaining soil moisture is crucial during the sprouting stage. Pumpkin seedlings require consistent moisture, but overwatering can harm them. The soil should be damp but not waterlogged to prevent root rot, fungal diseases, and other complications.
It’s important to monitor weather conditions and adjust your watering schedule accordingly. In hotter and drier conditions, you may need to water the seedlings more frequently, while in cooler and wetter climates, you may reduce watering.
3. Seedlings: the Emergence Of True Leaves & Their Importance
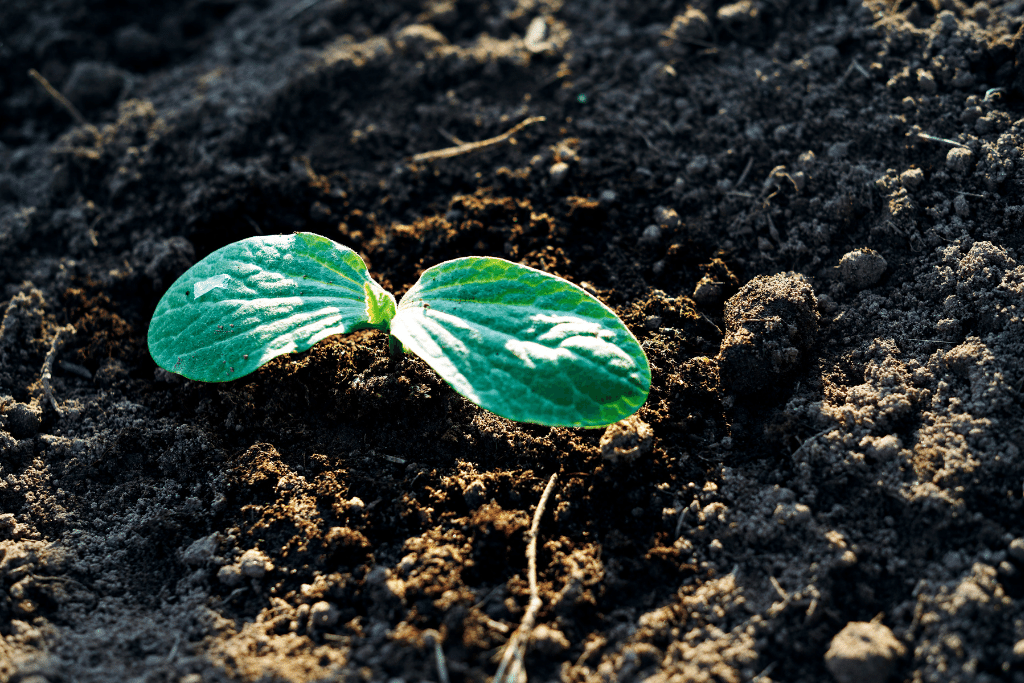
As your pumpkin seedlings progress, they reach a critical milestone with the appearance of their first true leaves. These leaves are distinct from the initial cotyledons, featuring jagged edges and a vibrant dark green color. The true leaves indicate that the plant is maturing.
True pumpkin leaves are crucial for photosynthesis, the process by which plants convert sunlight into energy. As the plant grows, they take over the role of photosynthesis from the cotyledons, supplying the energy needed for further growth and the eventual production of flowers and fruit.
During this stage, the pumpkin plant relies more on the true leaves for energy. It’s essential to provide the right growing conditions for them, ensuring the plants receive at least six hours of sunlight daily for optimal photosynthesis. Insufficient sunlight can lead to weak, leggy growth and reduced plant health.
In addition to sunlight, maintaining consistent soil moisture is vital during this stage. As pumpkin plants continue to develop their root systems, they need a steady water supply. Be careful not to overwater the plants and adjust your watering schedule based on weather conditions and soil moisture levels.
4. Pumpkin Vines: Growth Of Main And Secondary Vines
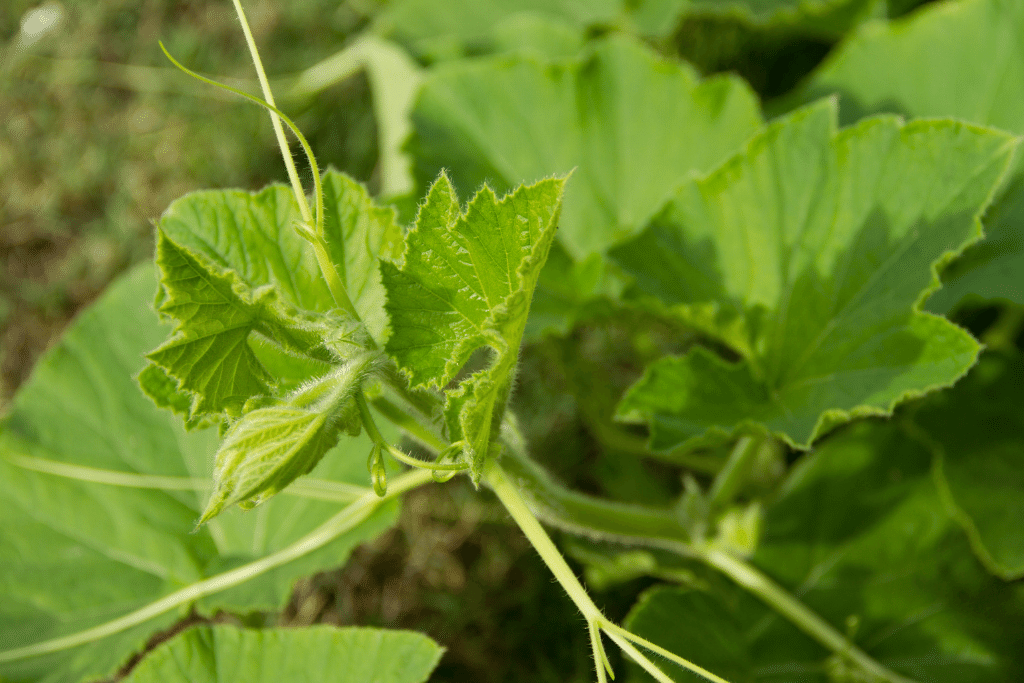
As pumpkin plants mature, they begin to develop vines. The main vines are the primary growth stems extending from the base of the plant, while secondary vines emerge from the main vines, providing additional support and foliage for the plant.
This stage requires a long growing season and plenty of space, as pumpkin vines can grow up to 30 feet long. To support healthy vine growth, it’s crucial to apply a balanced fertilizer rich in nitrogen, phosphorus, and potassium.
Nitrogen promotes foliage growth, while phosphorus supports root development and flowering. Potassium is essential for fruit development and overall plant health.
Check out this article for vine growing vegetables.
5. Pumpkin Flowers: Identifying Male and Female Flowers
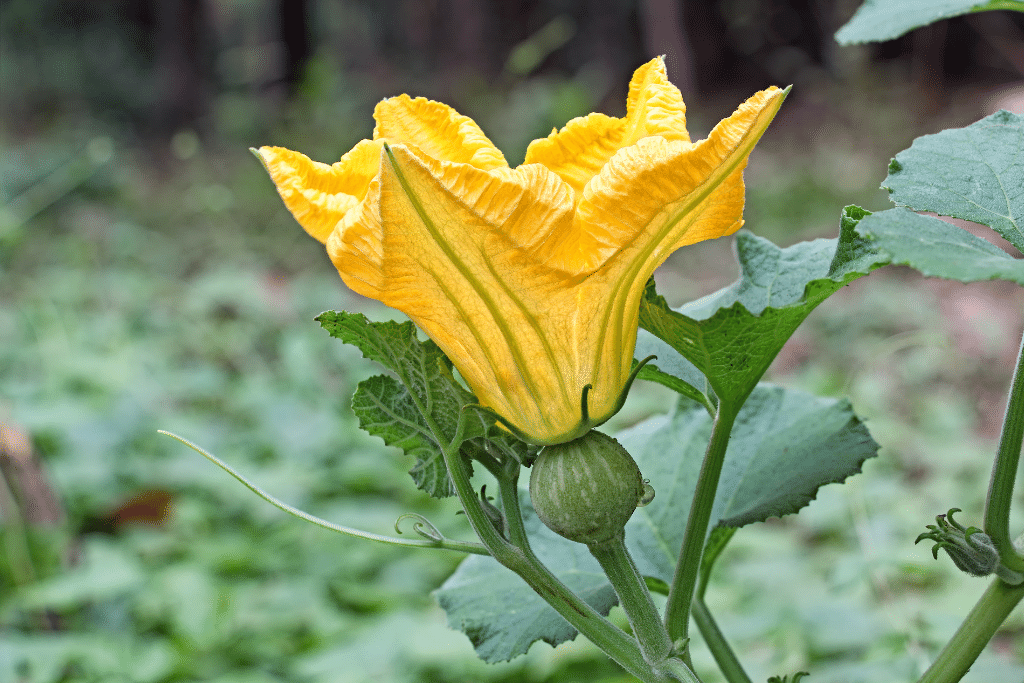
As pumpkin vines grow and thrive, they start to produce flowers necessary for the plant’s reproduction. It’s important to recognize that pumpkin plants have separate male and female flowers, each with unique characteristics that play distinct roles in the plant’s reproductive process.
Male flowers typically appear first on the vines, followed by female flowers. Male pumpkin flowers can be easily identified by their long stems and single, pollen-filled stamen at the center. These flowers are responsible for producing the pollen needed for pollination. They are generally more numerous than female flowers and are often found higher up on the vines.
In contrast, female flowers grow closer to the vine and feature a small, immature pumpkin, or ovary, at their base. If pollination succeeds, this tiny pumpkin-like structure will eventually transform into a mature fruit.
6. Pollination: A Key Component Of Pumpkin Growth
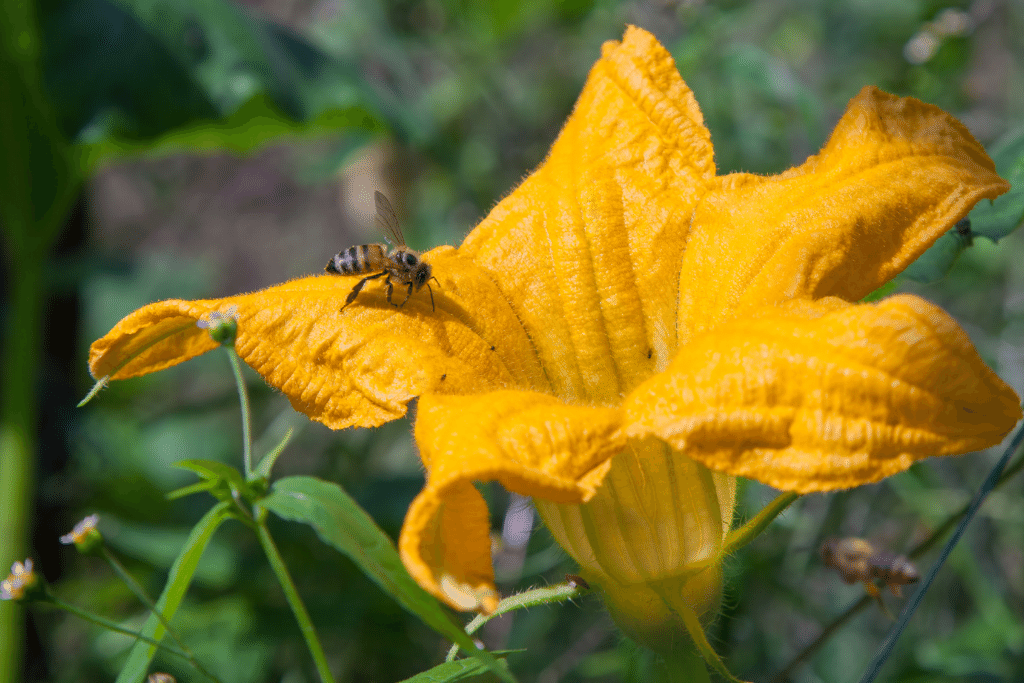
Pumpkin growth heavily depends on pollination, a process that results in the development of pumpkin fruit. Bees and other pollinators are vital to this process, as they transfer pollen from male flowers to female flowers. Common pollinators for pumpkin plants include honeybees, squash bees, and bumblebees, all contributing to a flourishing pumpkin garden.
To achieve successful pollination, you can take various steps to attract bees and other pollinators to your garden.
One practical approach is to plant a variety of flowers nearby, especially those that bloom simultaneously with your pumpkin plants. These flowers not only beautify your garden but also draw in pollinators, increasing the chances of successful pumpkin pollination.
However, there may be situations when your garden needs more pollinators, possibly due to environmental conditions, pesticide usage, or habitat loss. In fact, many farmers are using managed honey bee colonies since wild bee colonies are in decline. For home growers, manually pollinating pumpkin flowers is an option. Using a small paintbrush, pick pollen from the male flowers and carefully transfer it to the female flowers’ stigma. Be cautious not to damage delicate flower structures, as this can lead to unsuccessful pollination and hinder fruit development.
7. Pumpkin Development
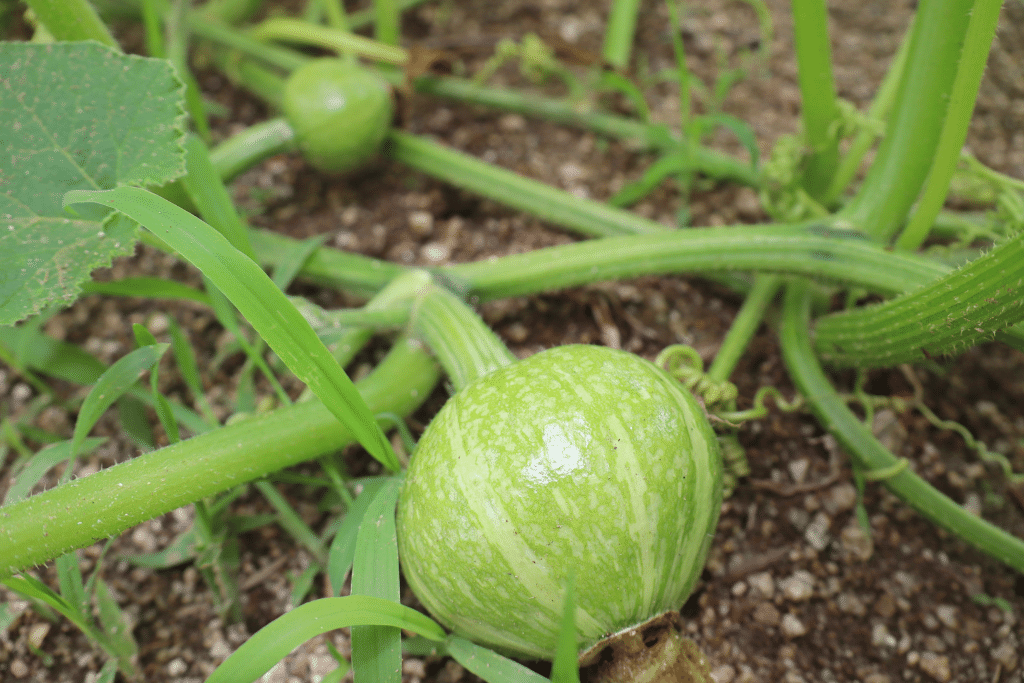
Following successful pollination, the small green pumpkin at the base of the female flower will begin to grow and develop. Consistent watering and providing the necessary nutrients are essential during this stage. A combination of fertilizer, compost, or manure can supply pumpkin plants with the vital elements they need to thrive.
In addition to proper watering and nutrition, it’s crucial to monitor the plants for pests and bugs. Pests such as aphids, squash bugs, and cucumber beetles can cause significant damage to both the pumpkin fruit and the vines. To protect your pumpkin plants, you should use an integrated pest management strategy, which includes regular inspection, biological controls, and the use of pesticides.
As the pumpkin matures, it will undergo a fascinating transformation, changing color from dark green to vibrant orange. This color change is not only visually appealing but also serves as a reliable indicator that the pumpkin is approaching its harvesting stage.
Read more about green pumpkin varieties.
8. Harvesting: Picking the Perfect Pumpkin
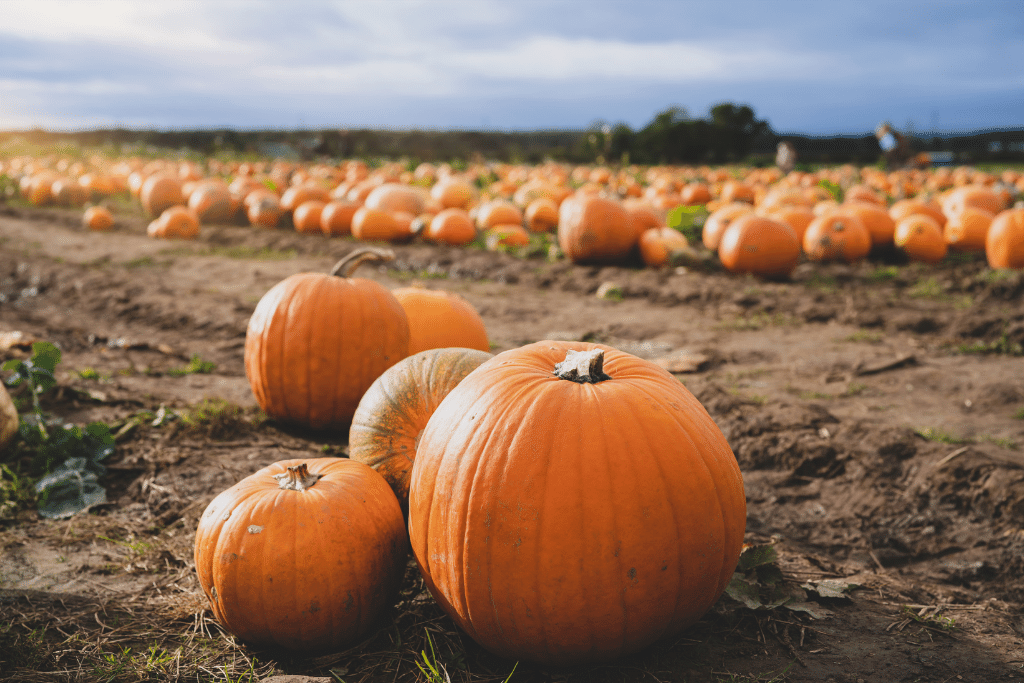
Choosing the right time to harvest pumpkins ensures a long shelf life and the most enjoyable flavor. Knowing the signs of a ripe pumpkin can help you determine when to pick your fruit and enjoy the results of your hard work.
A ripe pumpkin will exhibit several characteristics that signal it’s ready for harvest. One key indicator is a hard shell that produces a hollow sound when tapped, indicating that the pumpkin has reached its ideal level of maturity and is ready for picking.
Furthermore, a ripe pumpkin will boast a deep, rich color, which can vary depending on the specific variety but is most commonly a vibrant orange.
Another indicator that a pumpkin is ripe and ready for harvest is the condition of its stem. As the pumpkin ripens, the stem will dry up and wither, and its color will change from green to gray. These changes signal that it’s time to remove the fruit from the vine.
To harvest your pumpkin cleanly, you’ll need a sharp knife or pruning shears to cut the stem. Leave a few inches of stem attached to the pumpkin, as this will help extend its shelf life and protect it from rot. Be cautious when cutting the stem to avoid breaking it off from the pumpkin, as this could expose the fruit to decay and diminish its quality.
9. Curing and Storage:
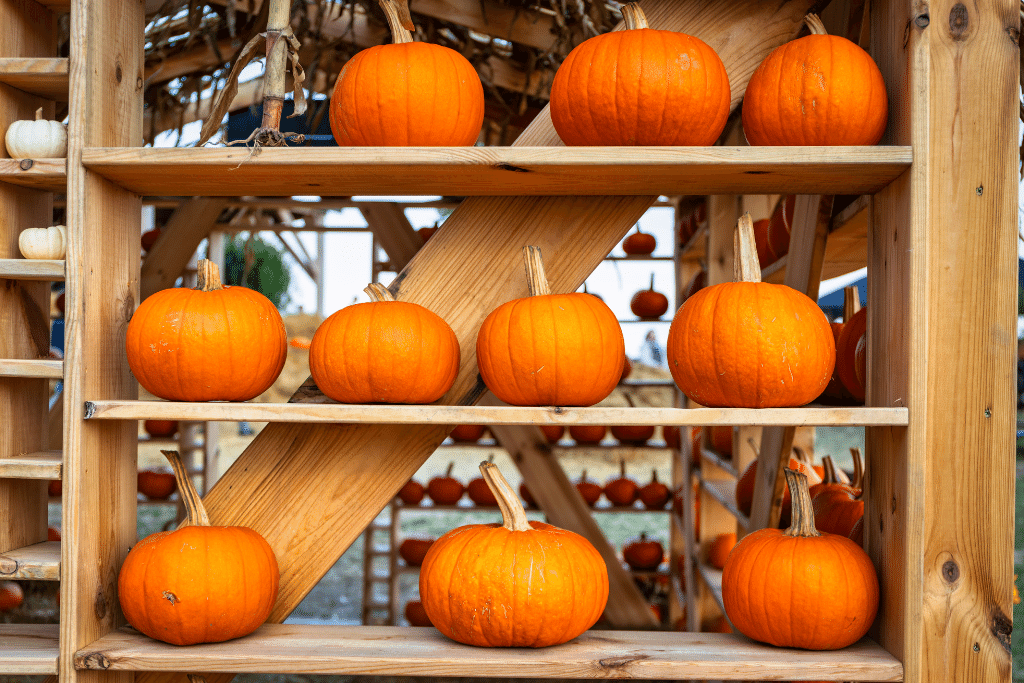
Once you’ve harvested your pumpkins, the journey doesn’t end there. Curing and proper storage are essential to maximize their shelf life and maintain their quality. Here’s how to ensure your pumpkins stay in top condition:
Curing:
After harvesting, cure your pumpkins to toughen their skins and promote long-lasting freshness. To do this, follow these steps:
- Find a warm, dry, and well-ventilated location with temperatures between 75-85°F (24-29°C).
- Place your harvested pumpkins in this curing area and allow them to remain there for approximately 10-14 days.
- During this period, the pumpkins will harden their rinds, creating a protective layer that extends their storage life.
Storage:
Storing your pumpkins correctly is crucial to prevent premature rot and decay. Here’s how to store your pumpkins for extended freshness:
- Choose a cool, dark, and well-ventilated area with temperatures ranging from 50-55°F (10-13°C). Basements or root cellars often work well for this purpose.
- Ensure the storage area has proper air circulation, as good ventilation prevents the buildup of excess moisture, which can lead to mold and spoilage.
- Arrange your pumpkins on shelves or racks, ensuring they don’t touch one another. This minimizes the risk of potential bruising and the spread of rot.
- Periodically check your stored pumpkins for any signs of decay or damage. Remove any damaged pumpkins promptly to prevent them from affecting others.
- Stored correctly, pumpkins can last for several months, making it possible to enjoy their benefits long after the harvest season.
These curing and storage practices will ensure that your pumpkins stay fresh and ready for carving, cooking, or decorating well beyond the autumn season. Properly cared-for pumpkins will be a delight to have around and make your efforts in growing them all the more rewarding.
What are the Best Conditions to Grow a Pumpkin?
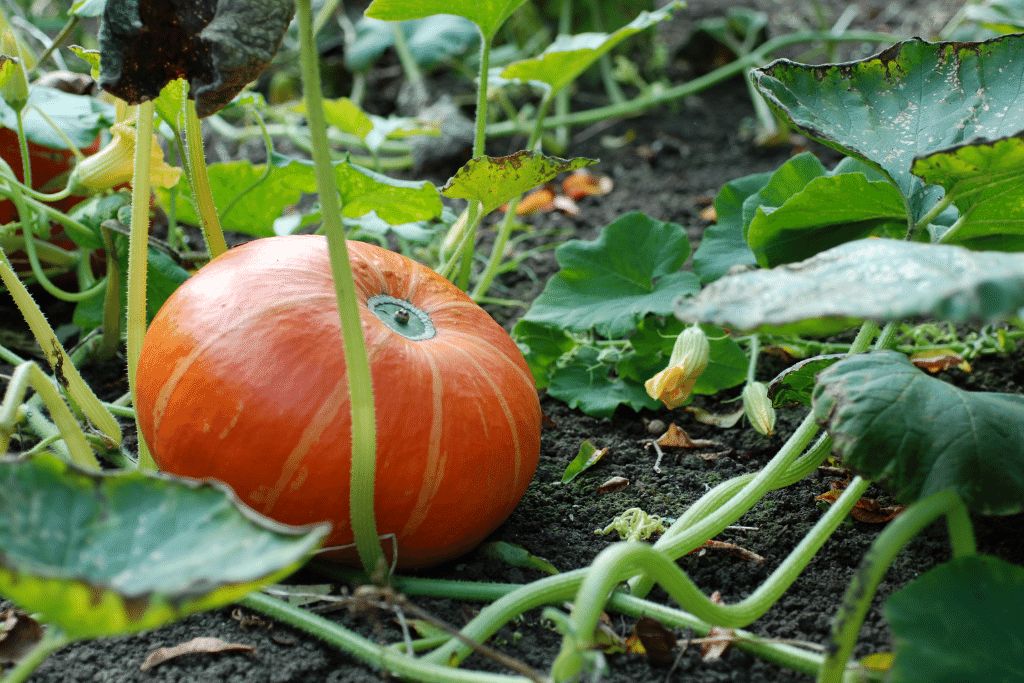
Growing healthy and robust pumpkins begins with providing them with the best possible conditions. To ensure your pumpkin plants thrive and produce bountiful harvests, you need to consider factors like climate, sunlight, space, soil quality, and proper care. Here are the key elements that create the ideal conditions for growing pumpkins:
Sunlight:
Pumpkins are sun-loving plants, and they require a minimum of 8 hours of direct sunlight daily to reach their full potential. Ensure that your chosen planting location receives ample sunlight, as this directly impacts the plant’s growth and the quality of the pumpkins it produces.
Climate:
The best climates for growing pumpkin plants are typically found in USDA zones 3 to 7. These regions offer suitable conditions for pumpkin cultivation. While pumpkins can be grown outside of these zones, gardeners in regions with extreme weather conditions may need to take extra precautions to protect their plants.
Space:
Pumpkin plants are known for their sprawling growth, and it’s essential to consider the amount of space they need at maturity. On average, a vining pumpkin plant requires a substantial area of at least 50 to 100 square feet.
Planting even a few pumpkins can quickly occupy a significant portion of your garden space.
Soil Preparation:
Proper soil preparation is critical for successful pumpkin growth. Pumpkins are often grown in raised hills, which serves two essential purposes: it raises the average soil temperature, promoting quicker germination and growth, and it improves soil drainage around the root system, preventing waterlogging and root rot.
Ideal soil conditions for pumpkins include a pH level between 6.0 to 6.8. Sandy soil enriched with organic material is excellent for drainage and maintaining suitable soil temperature.
Support and Space-Saving Techniques:
While most pumpkin varieties grow by sprawling along the soil’s surface, smaller or bush-type varieties can be trained to grow vertically, saving space and protecting the fruit from damage. Consider using trellises or supports to encourage vertical growth if you have limited garden space.
Soil Enrichment:
Amend the soil before planting by incorporating aged compost, well-rotted manure, or a balanced fertilizer such as 10-10-10. Pumpkin plants have extensive root systems, so enriching the soil provides essential nutrients for healthy growth and pumpkin production.
Watering Practices:
Pumpkins require consistent moisture, typically about 1 inch of water per week. Proper irrigation is crucial for their development. When watering, take care to keep the leaves and fruit dry, as damp foliage can lead to fungal diseases. Drip irrigation or soaker hoses are excellent options to ensure that water reaches the root zone without wetting the leaves.
By providing the best conditions for your pumpkin plants, you can look forward to a fruitful harvest of vibrant, healthy pumpkins. Careful consideration of these factors and diligent maintenance will contribute to a successful pumpkin-growing experience.
Are Jack-O Lantern Pumpkin Growing Stages Different Than A Regular Pumpkin’s?
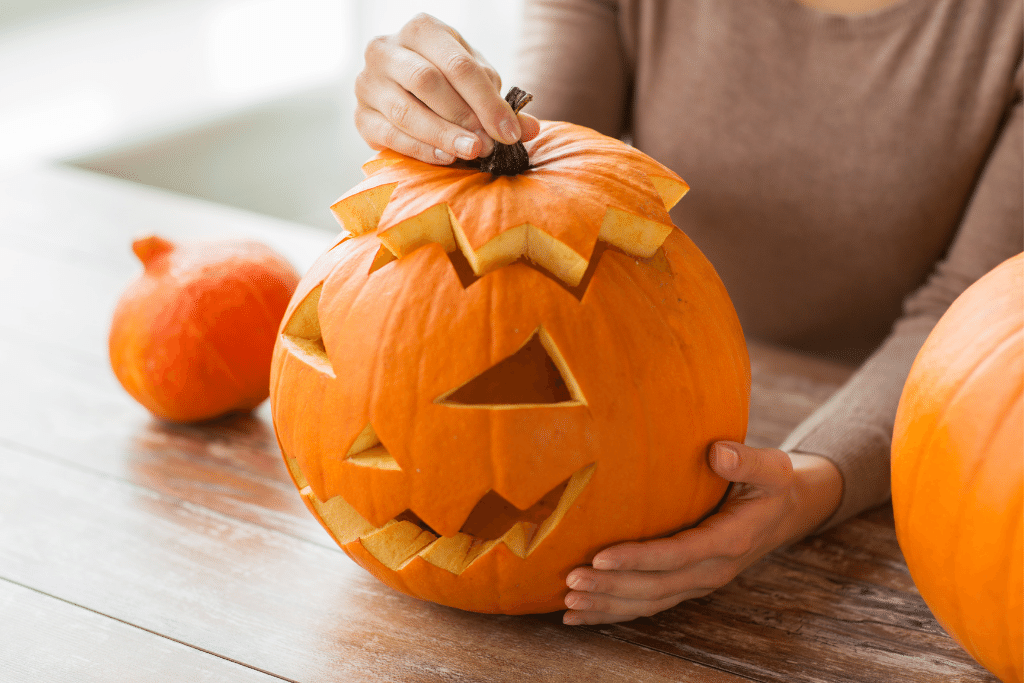
A jack-o-lantern pumpkin goes through the same growth phases as any other pumpkin variety, but it’s the final stage, harvesting, that is crucial for carving a spooky masterpiece.
How to Grow Jack-o’-lantern Pumpkins
When it comes to growing jack-o’-lantern pumpkins, whether you’re planning to carve them into spooky faces or simply enjoy their vibrant orange hue as a decorative element. Here’s a step-by-step guide on how to grow jack-o’-lantern pumpkins:
How to Plant Jack-o’-lantern Pumpkins in the Garden
- Select the Right Variety: Choose a variety of pumpkin seeds specifically labeled as suitable for carving or jack-o’-lanterns. These varieties typically have the classic deep orange color and sturdy stems.
- Timing is Key: Plant your jack-o’-lantern pumpkin seeds in the garden when all danger of frost has passed, and the soil temperature is consistently above 70°F (21°C). In most regions, this means planting in late spring.
- Choose a Sunny Spot: Select a location in your garden that receives at least 6-8 hours of direct sunlight per day. Pumpkins thrive in full sun.
- Prepare the Soil: Ensure your soil is well-draining and rich in organic matter. You can improve soil quality by adding compost or well-rotted manure. Pumpkins are heavy feeders, so they benefit from nutrient-rich soil.
- Plant the Seeds: Plant pumpkin seeds about 1 inch deep in small mounds or hills. You can create these mounds by adding several seeds together and spacing them 2-3 feet apart to provide ample room for vines to spread. Leave 6-8 feet of space between rows to prevent overcrowding.
- Water Thoroughly: After planting, water the seeds thoroughly. Keep the soil consistently moist but not waterlogged as the seeds germinate and seedlings emerge.
How to Care for Jack-o’-lantern Pumpkins:
Maintain Consistent Moisture: Pumpkins require regular watering throughout their growing season. Be sure to waterat the base of the plants to keep foliage dry and reduce the risk of fungal diseases. Adjust your watering schedule based on weather conditions; more water may be needed during hot and dry spells.
Fertilize Appropriately: Jack-o’-lantern pumpkins benefit from a balanced fertilizer that provides essential nutrients. You can apply a well-balanced granular fertilizer or use a liquid fertilizer throughout the growing season.
Pest and Disease Management: Keep a close eye on your pumpkin plants for signs of pests such as aphids, squash bugs, or cucumber beetles. Apply appropriate pest management techniques, including handpicking, natural predators, and approved pesticides if necessary.
Additionally, monitor for signs of common pumpkin diseases like powdery mildew and take appropriate preventive or curative measures.
Support the Vines: As the vines grow and pumpkins develop, provide support for the fruit by gently lifting them off the ground using boards, straw, or fabric. This helps prevent rot and maintains the pumpkin’s shape.
How to Harvest Jack-o’-lantern Pumpkins:
Harvesting jack-o’-lantern pumpkins at the right time is crucial for creating long-lasting and attractive decorations. Here’s how to determine when your pumpkins are ready for harvest:
Check the Color: The classic sign of a ripe jack-o’-lantern pumpkin is a vibrant and consistent deep orange color. While there may be slight variations based on the variety, the pumpkin should exhibit a predominantly orange hue.
Inspect the Stem: The stem of a ripe jack-o’-lantern pumpkin will dry up and turn a brownish-gray color. This is a clear indicator that the pumpkin is mature and ready for harvesting.
Test the Rind: Gently tap the pumpkin’s rind with your knuckles. A mature pumpkin will produce a hollow sound, indicating that it’s ready for harvest.
Use Pruning Shears or a Knife: To harvest your jack-o’-lantern pumpkins, use pruning shears or a sharp knife to cut the stem about 2-4 inches above the pumpkin. Leaving a short stem attached to the fruit helps prolong its shelf life.
Handle with Care: Be gentle when handling harvested pumpkins to avoid bruising or damaging the skin.
These steps will aid you in growing and harvesting beautiful jack-o’-lantern pumpkins that are perfect for carving into spooky or creative designs.
What are the White Pumpkin Growing Stages?
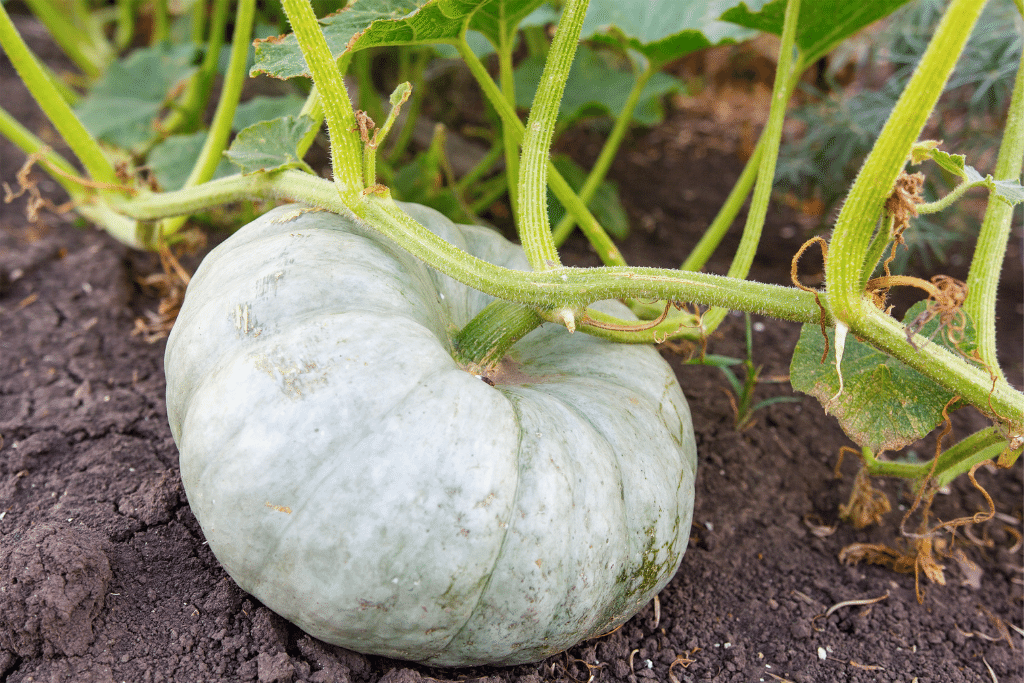
White pumpkins are a unique and stylish alternative to the traditional orange ones, however. Their growing stages are similar, but the difference lies in the color transformation and the characteristics of the final fruit.
White pumpkin seeds are sown, and they go through the stages of germination, seedlings, vine growth, flowering, and fruit development. However, white pumpkins stay white throughout their growth cycle. When they reach maturity, they may develop a slightly creamy or pale yellow hue, depending on the variety.
The key to growing healthy and attractive white pumpkins is proper care throughout all stages. Pay attention to soil quality, adequate sunlight, consistent watering, and protection from pests and diseases. With the right care, you can enjoy the beauty of white pumpkins in your garden and use them for decorating or carving unique designs.
Bonus Tip – Take Pumpkin Growing Stages Pictures For Documenting The Progress
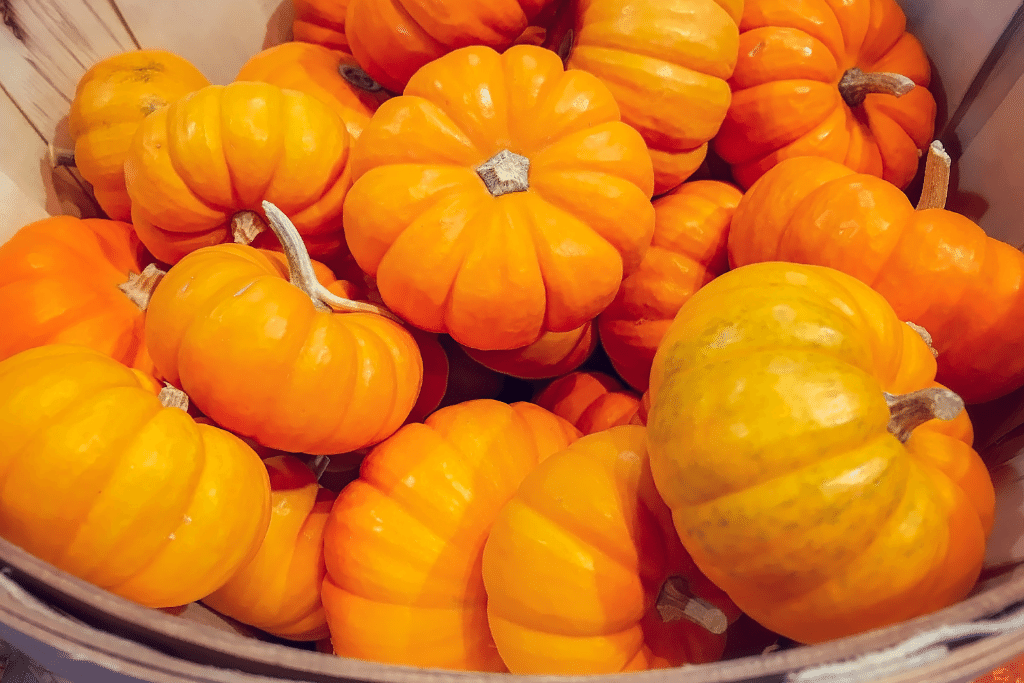
For those who are visual learners or simply appreciate the beauty of pumpkin growth, pictures can be a valuable resource. Throughout the pumpkin growing stages, you can document the progress of your pumpkins with photos to create a visual timeline. Here’s how you can use pictures to enhance your understanding of pumpkin growth:
Germination And Sprouts: Capture the moment when the first sprouts break through the soil, showcasing the emergence of life from the seeds.
Seedlings And True Leaves: Document the growth of the true leaves, highlighting their distinctive shape and color compared to the initial cotyledons.
Vine Growth: Show the development of the main vines and their progression throughout the growing season.
Flower Blossom And Pollination: Photograph the male and female flowers, and if possible, capture the moment of pollination by bees or your manual efforts.
Fruit Development: Create a visual record of the small pumpkins forming and their growth over time.
Harvesting: Take pictures when your pumpkins are ready for harvest, showcasing their vibrant color and sturdy stems.
Jack-o-Lantern And White Pumpkin: If you’re growing specific varieties such as jack-o-lanterns or white pumpkins, include photos of these unique characteristics.
Documenting the entire pumpkin growth cycle with pictures will help you create a visual diary of your gardening journey. These pictures not only serve as a reference for future plantings but also allow you to share the fascinating process of pumpkin growth with others.
Common Pumpkin Growing Problems and Solutions
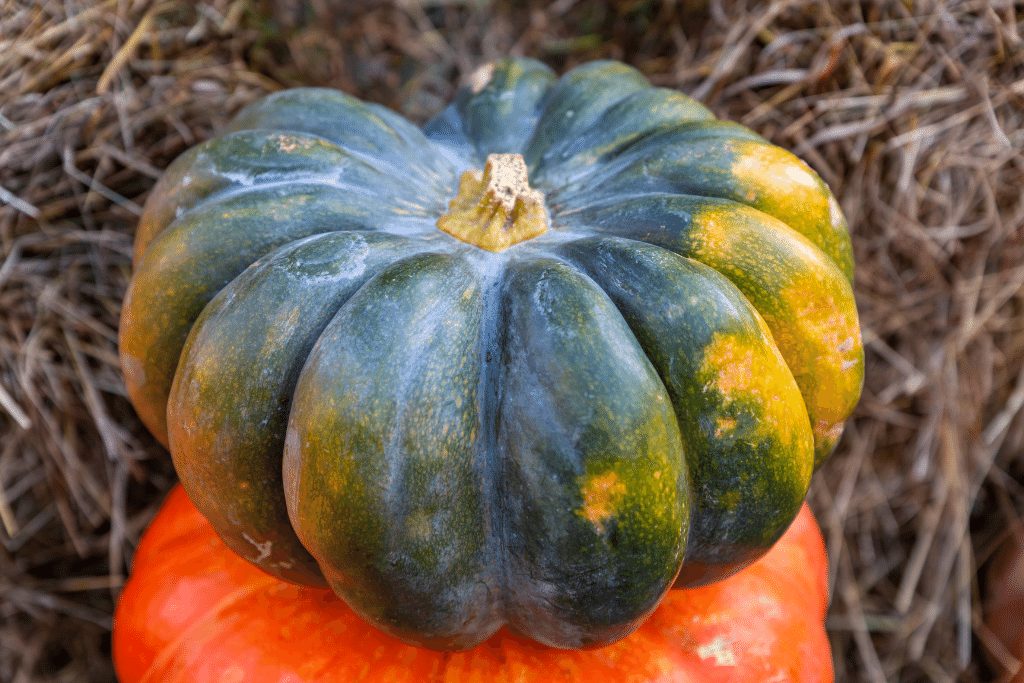
Growing pumpkins can be a delightful experience, but it comes with a set of common challenges. To help you tackle these issues, here are some prevalent pumpkin growing problems and their respective solutions:
1. Rotting on a Pumpkin Vine:
Symptoms: Sometimes, your developed pumpkin can start rotting even though it is still attached to its vine, often due to overwatering or damp conditions.
Solutions: To prevent this issue, lift your pumpkin fruits slightly above the ground to avoid direct contact between the soil and your growing pumpkin.
2. White Pumpkin Plant (Powdery Mildew):
Symptoms: White, powdery spots on leaves and stems indicate powdery mildew, a common fungal disease that can weaken your plant.
Solutions: Use a mixture of water, baking soda, and liquid soap, applying it regularly as a homemade remedy. Alternatively, consider using a commercial organic fungicide to control the issue.
3. Pumpkin Plant Not Flowering:
Symptoms: Sometimes, pumpkin plants take time to flower, but a lack of flowering can result from nutrient deficiencies, especially potassium.
Solutions: Ensure your plant receives adequate potassium by initiating regular fertilization once the pumpkin vines have formed and continuing fertilization throughout the growing season to encourage flowering.
4. Stunted Pumpkin Growth:
Symptoms: Despite a healthy vine and numerous flowers, if your pumpkin isn’t developing fruit, it may be due to pollination issues or environmental factors.
Solutions: Hand-pollinate the flowers to ensure successful fruit development. Provide an environment conducive to pollinators, and be cautious of excess nitrogen in your soil.
5. Leggy Pumpkin Seedlings:
Symptoms: Leggy, thin seedlings occur when they lack sufficient sunlight during the early stages of growth.
Solutions: To prevent leggy seedlings, plant your pumpkin seeds in a sunny location. If you’re dealing with leggy seedlings, you can attempt to reflect sunlight onto them using white sheets, though this method may not be entirely reliable.
6. Powdery Mildew:
Symptoms: White, powdery spots on leaves and stems, indicating a fungal infection.
Solutions: Prepare a mixture of water, baking soda, and liquid soap and apply it regularly. Alternatively, consider using a commercial organic fungicide for control.
7. Squash Bugs:
Symptoms: Oval-shaped insects with a shield-like appearance that feed on your plants.
Solutions: Handpick and destroy the bugs and their egg clusters. You can also use insecticidal soap to manage their presence.
8. Blossom End Rot:
Symptoms: Dark, sunken spots at the blossom end of the fruit, often due to calcium deficiency.
Solutions: Maintain consistent soil moisture and apply a calcium-rich fertilizer to prevent calcium deficiency.
9. Aphids:
Symptoms: Small, soft-bodied insects clustering on leaves, potentially causing damage.
Solutions: Dislodge aphids by spraying plants with a strong stream of water. Consider introducing natural predators like ladybugs to help manage the infestation.
10. Cucumber Beetles:
Symptoms: Small, striped beetles that feed on leaves and flowers, potentially harming your plants.
Solutions: Apply diatomaceous earth as a natural pest control method. Consider using row covers to protect your plants from these pests.
11. Fungal Diseases:
Symptoms: Discolored, wilting, or deformed leaves and fruit, often caused by various fungal pathogens.
Solutions: Enhance air circulation by pruning to increase sunlight exposure. Remove and destroy infected plant parts to prevent further spread.
12. Nutrient Deficiencies:
Symptoms: Yellowing or browning of leaves and poor growth can result from nutrient imbalances.
Solutions: Test the soil and adjust nutrient levels as needed. Apply a balanced fertilizer to provide the necessary nutrients for your pumpkin plants’ healthy growth.
These are some of the most common pumpkin growing problems that you can come across. To tackle them, make sure to follow the solution steps. With the provided solutions, you can promote the vitality of your pumpkin plants and increase your chances of a successful harvest.
FAQS – Pumpkin Growing Stages
How Long Does It Take To Grow A Pumpkin?
The time it takes for a pumpkin to grow to maturity can vary depending on the variety. On average, pumpkins take up to 100 days to be ready for harvest. Smaller decorative pumpkins may be ready in as little as 75 days, while giant pumpkins can take 120 days or even longer to ripen.
How Long Does A Pumpkin Vine Grow?
Traditional pumpkin varieties can produce vines that grow remarkably long. By the end of the growing season, pumpkin vines can extend up to 20 to 30 feet. This extensive growth is why it’s important to allocate ample space for each pumpkin plant.
How Long Does Each Cycle of Pumpkin Growing Stage Last?
The growth stages of a pumpkin can be broken down into several phases, from seed to harvest. On average, these stages encompass the 100-day period, but it’s essential to monitor the specific variety you’re growing for a more accurate timeline.
Can I Grow Pumpkins in Containers or Small Spaces?
While pumpkins are known for their sprawling vines, some compact or bush varieties are suitable for container gardening or small spaces. It’s essential to choose the right variety and provide proper care in such cases.
When Is the Best Time to Harvest a Pumpkin?
Harvesting your pumpkin at the right time is crucial for flavor and storage. Most pumpkins are ready for harvest when their skin hardens, and the stem begins to dry.


