Are you struggling to keep your plants hydrated and healthy in self watering pots? You’re not alone. Self watering pots may make it easier to take care of plants, but they can still come with some problems that are frustrating and difficult to solve!
To help you in this regard, we’ve compiled the most common problems with self watering pots and will provide tips to help diagnose and fix them.
So, if you’re facing improper drainage, clogged or damaged parts, we’ve got your back. Read on to learn how to identify and address the most common problems with self watering pots!
What is a Self Watering Pot?
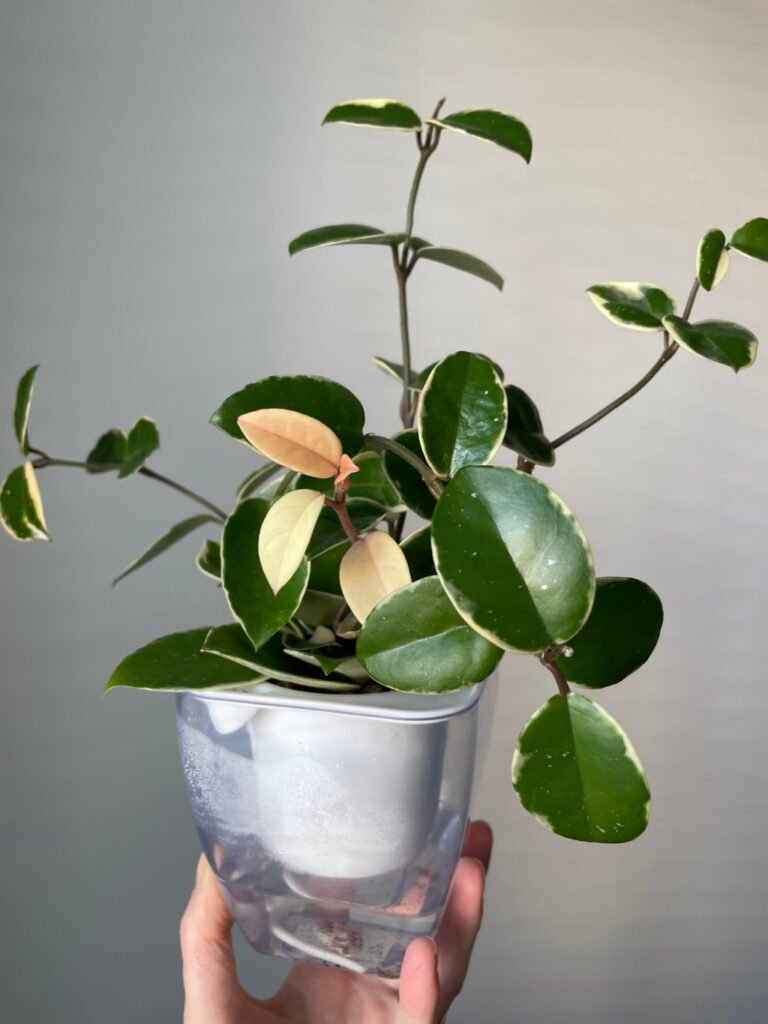
Self-watering pots are a great way to take care of plants with minimal effort. These specialized containers have an integrated irrigation system, allowing them to deliver water directly to plants’ soil and roots. This eliminates the need to water them manually.
The main advantage is that these pots do not require constant watering as they can be filled just once or twice a month, depending on the type of pot. Self-watering pots also enable you to control the amount of water delivered to your plants, keeping them healthy and preventing over- or under-watering.
Self watering pot components:
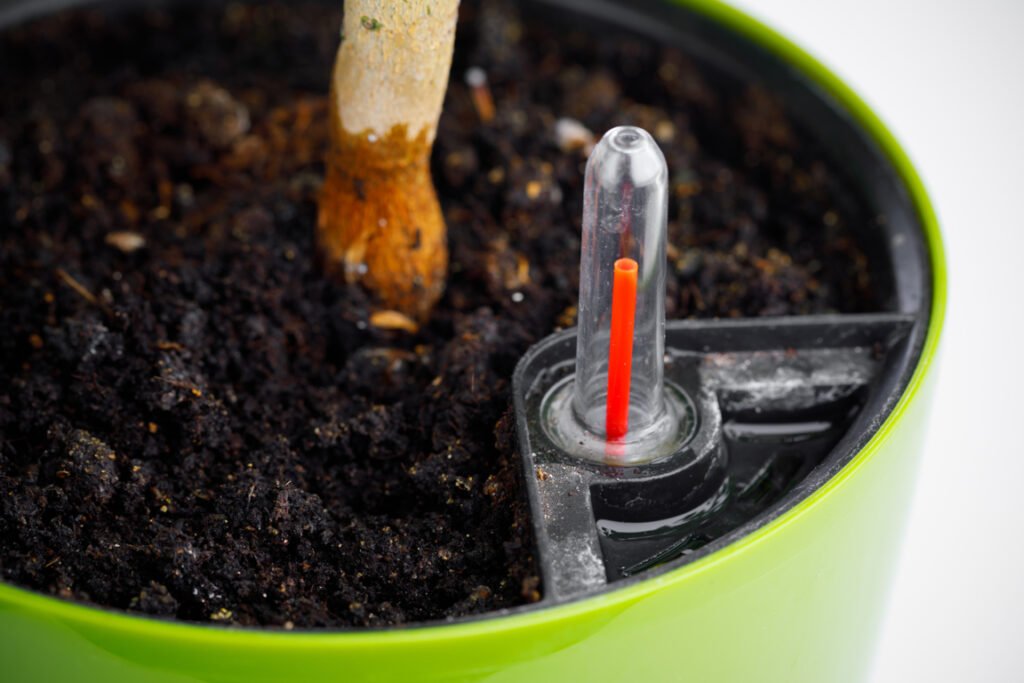
Self watering pots have many components that work together to deliver water effectively. There are two main parts: the reservoir and the wicking system.
The reservoir is a container filled with water and secured to the bottom of the pot, while the wicking system is made up of capillary mats or strips that transport water from the reservoir up to the soil.
Working mechanism:
When soil gets dry, it starts to absorb moisture from its surroundings. This moisture will eventually reach the capillary mats, drawing it up and into the soil. This system is designed to keep the soil moist at all times, reducing the need for manual watering.
Self watering pots are an effective way to maintain healthy plants as they provide continuous hydration without monitoring or adjusting water levels. However, like any other type of potting system, they can still be subject to common problems. By understanding what these self watering pot issues are and how to identify and fix them, you can ensure your plants stay in their best condition!
Issues With Self Watering Pots
1. Poor drainage:
If water is not draining correctly from your self-watering pot, it’s crucial to pinpoint the cause. This could be due to the reservoir not being adequately sealed or clogged parts in the system itself. Poor drainage can lead to root rot, affecting plant health and growth.
Diagnosing:
To diagnose poor drainage, check if the reservoir is properly sealed. If not, there may be a leak in the seal or clogged parts preventing water from flowing through. You can also check to see if the water is actually reaching the reservoir by filling it with water and seeing if it’s draining out.
Fixing:
If the seal is damaged or clogged parts are blocking the flow of water, you’ll need to replace them. If the reservoir is not adequately sealed, you may need to reseal it with a clear sealant. You can also use a mixture of vinegar and water to unclog any remaining debris in the system.
2. Clogged or damaged wicks:
Self-watering pots rely on wicks to carry water up from the reservoir and deliver it to the soil. If these wicks become clogged or damaged, they won’t be able to do their job properly, leading to inadequate watering and poor plant health.
Diagnosing:
To diagnose a clogged or damaged wick, start by inspecting the wick itself. If there are any visible clogs or tears in the material, you’ll know that this is likely the culprit. You can also check to see if the water flows from the reservoir properly.
Fixing:
If your inspection indicates that the wick is clogged or damaged, you’ll need to replace it with a new one. Before replacing the wick, clean any debris from the reservoir itself so that the new wick isn’t affected by any remaining blockages.
3. Overwatering:
Self watering pots overwatering can be an issue for plants, as too much water can lead to root rot and nutrient deficiencies. Plant health will also suffer if the potting soil is not draining properly.
Diagnosing:
To diagnose overwatering, start by inspecting the soil around your plant. If the soil appears soggy or has a peculiar smell, this indicates that there’s too much water in the soil.
Fixing:
If you find that your plant is being overwatered, there are a few things you can do to help fix the issue. First, ensure that the reservoir is not overfilled and the water isn’t spilling out. You can also reduce the amount of water in the reservoir or add a drainage layer to help reduce moisture levels. Lastly, you may want to consider adding more soil to the pot to absorb excess moisture better.
4. Underwatering:
Underwatering can also be an issue with self watering pots, as insufficient water can lead to stunted growth and dried-out soil.
Diagnosing:
To diagnose underwatering, check the soil around your plants. If the soil appears dry or has a dusty texture, this is a sign that there’s not enough water in the soil.
Fixing:
To fix the underwatering issue in a self watering pot, make sure the reservoir is full of water and that the wick is connecting the soil to the water in the reservoir. Consider installing a timer on your system to automatically refill as needed.
Try adding a layer of mulch as well, as it can help retain moisture in the soil.
5. Doesn’t suit all plants:
Unfortunately, self watering pots may not be suitable for all types of plants. Some plants need more frequent watering than a self-watering pot can provide, and some heavy feeders require more nutrients than a self-watering system can deliver.
Diagnosing:
To diagnose if a self-watering pot is not suitable for your particular plant, check to see if the soil is staying moist or if the water in the reservoir is being depleted too quickly.
Fixing:
If you find that a self-watering pot does not suit your particular plant’s needs, then you may need to consider other watering methods, such as hand-watering or using a drip irrigation system. It’s also essential to provide your plants with the proper nutrients via fertilizers or other soil amendments.
6. Becomes a hotbed for mosquito eggs:
Self-watering pots can easily become a breeding ground for mosquito eggs if they’re not properly maintained. This can happen when the reservoir holds water for a long time. A few eggs will then multiply due to the sogginess and worsen the problem.
Diagnosing:
To diagnose if your self-watering pot has become a hotbed for mosquito eggs, look for any telltale signs of mosquito larvae in the reservoir or around the soil.
Fixing:
If you find your pot harboring mosquitoes, then it’s important to take the proper steps to remove them from the area. To start, empty out the reservoir and scrub any remaining debris or eggs from the surface. Then use a natural repellent such as citronella oil to help keep mosquitoes at bay. Furthermore, empty your reservoirs on a regular basis to keep mosquito larvae from taking up residence in them again.
7. Not fit for outdoor use:
Self-watering pots are not recommended for outdoor use as the elements can easily damage them. The reservoir is especially vulnerable to extreme temperatures, which can cause it to crack or leak. Apart from this, rainwater can also easily cause the water levels in the reservoir to become too high, leading to overwatering.
Diagnosing:
To diagnose if your self-watering pot is not suitable for outdoor use, check the reservoir for any signs of leaking or cracking. If there are any visible signs of damage, then it’s best to move the pot indoors.
Fixing:
If you’re looking to use a self-watering pot outdoors, then make sure it’s made from a durable material that can withstand extreme temperatures and weather conditions. Moreover, consider adding a drainage layer to help reduce water levels in case of unexpected rain or snow. You can do this by adding a gravel or sand layer to the pot’s bottom.
Lastly, if your self watering pot is outdoors and it’s the rainy season, make a habit of draining the reservoir regularly to ensure the water levels don’t spike.
8. Not sufficient for large pots:
Large plants have complex root systems and may require more water than a self-watering pot can provide.
Diagnosing:
To diagnose if your self-watering pot is not suitable for a large plant, check to see if the soil is drying out too quickly or if the water in the reservoir is not being depleted.
Fixing:
If a self-watering pot isn’t sufficient for your large plant, hand watering may be your best bet. Make sure to give your plants deep and thorough waterings to ensure that water reaches all parts of the root system.
Also, consider adding a soil amendment such as compost or fertilizer to help retain moisture and provide essential nutrients.
Check if your large plants are getting enough water, and check the soil on a regular basis for signs of drying out. If you notice any dryness in the soil, then it’s time to give your plants a deep watering.
Consider setting up a drip irrigation system for outdoor plants to ensure that your larger plants get the water they need.
9. Algae growth problem:
Self-watering pots can be vulnerable to algae growth due to the stagnant water in the reservoir.
Diagnosing:
To diagnose if your self-watering pot is harboring an algae problem, check for any discoloration or scum floating on top of the water.
Fixing:
If you find that your self-watering pot has an algae problem, then it’s important to take the proper steps to eradicate them. To start, empty out the reservoir and scrub any remaining debris or scum from the surface.
Reducing any sources of light in the area by covering up windows or using window screens can prevent sunlight from reaching the reservoir. In addition to that, adding a few drops of bleach to the water in the reservoir will help kill any existing algae and discourage future growth.
You can also add a small amount of aquarium salt or baking soda to the water in the reservoir to eliminate this problem.
If you’re facing an algae growth issue, empty the reservoir and refill it with fresh water on a regular basis. Doing so will suppress algae growth and keep your plants’ roots healthy and hydrated.
10. Mineral build-up promotes toxicity:
Mineral build-up in the water can cause a toxic environment for plants, leading to stunted growth or death.
Diagnosing:
Check the water reservoir daily for any discoloration. If the water color has changed, then you may have an issue with mineral buildup.
Fixing:
There are several ways to fix this problem. For starters, empty the reservoir and refill it with fresh water on a regular basis. This will help flush out any existing mineral build-ups and discourage new ones from forming.
You can also add a small amount of distilled white vinegar or baking soda to the water in your reservoir, which will help break down mineral deposits.
Best Alternatives to Self Watering Pots
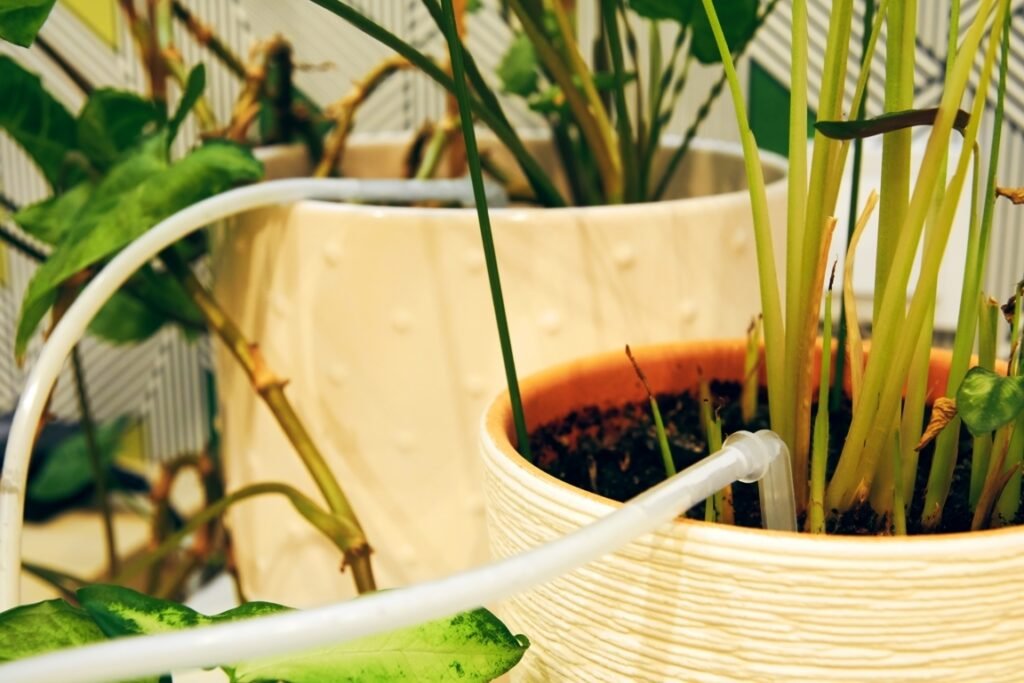
If you don’t want to use self-watering pots, plenty of alternatives are available. These are usually more traditional and cost-effective solutions than the self-watering pot option. Here are some of the best alternatives to consider when looking for a way to water plants in pots or containers.
Wicking system:
One of the most popular alternatives is to use a wicking system. This involves using a piece of material as a wick that absorbs water from the soil and brings it up to the plant’s root zone. The advantage of this approach is that it eliminates the need for frequent watering, as the water is brought directly to the root zone. It also ensures that water is delivered to the plant evenly and consistently.
Container irrigation system:
Another option you can go for is to use container irrigation systems. This involves placing small pipes or hoses within the container’s soil and using them to deliver a slow and steady stream of water. The advantage of this approach is that it can easily be adjusted to suit the needs of different plants and is easy to install and use.
Bottle drip irrigation:
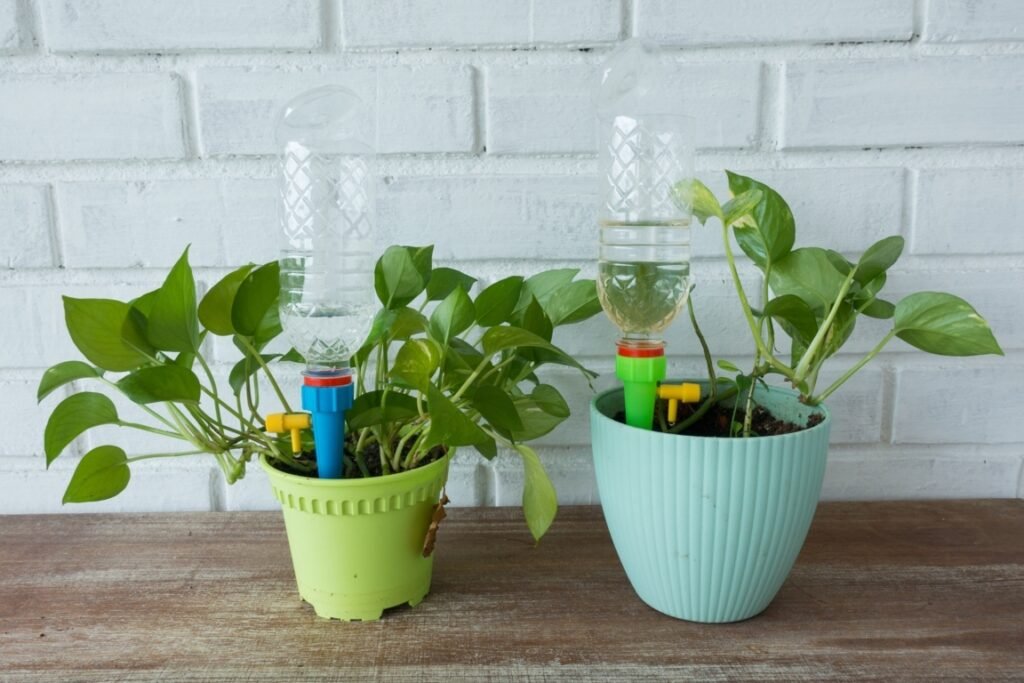
A third alternative is bottle drip irrigation. In this method, you simply place a small water-filled container, such as an empty plastic bottle, over the soil at the base of the plant and allow it to slowly drip water into the soil. The advantage of this approach is that it can be easily adjusted to suit different plants and is very efficient in delivering water to the root zone.
Conclusion
These were the most common problems with self watering pots and the corresponding solutions. While these problems can be overwhelming and frustrating, it is still important to remember that self-watering pots are an efficient way of growing your favorite plants. Following the steps outlined above, you can quickly identify and solve any issues you may encounter with your self-watering pot.
Frequently Asked Questions (FAQ)
What plants don’t like self watering pots?
Herbs, tomatoes, and peppers do not typically do well in self watering pots. Succulents are very drought-tolerant plants that can thrive in self-watering pots. Lettuce requires consistently moist soil to grow, so it may not be the best choice for a self-watering pot. It is vital to research the specific needs of each plant before placing it in a self-watering pot.
How much water does a self watering pot need?
The amount of water needed for self-watering pots will vary depending on the size and type of plant and weather conditions. Generally speaking, the plants should be watered every few days. When the soil starts to feel dry, it’s time to water. It is also important to keep an eye on the reservoir and refill it when needed.
Do self watering pots cause root rot?
Self-watering pots can cause root rot if the plants are overwatered. To avoid this issue, check the soil moisture and water only when needed. Make sure to empty the reservoir after each watering so that there is no standing water in the pot.
Can I use soil from my garden in a self watering pot?
Yes, you can use soil from your garden in a self-watering pot. However, it is crucial to ensure the soil is light and well-draining as heavy soils may retain too much water in the reservoir. Adding some organic matter, such as compost or peat moss, is also recommended for optimal growth.


