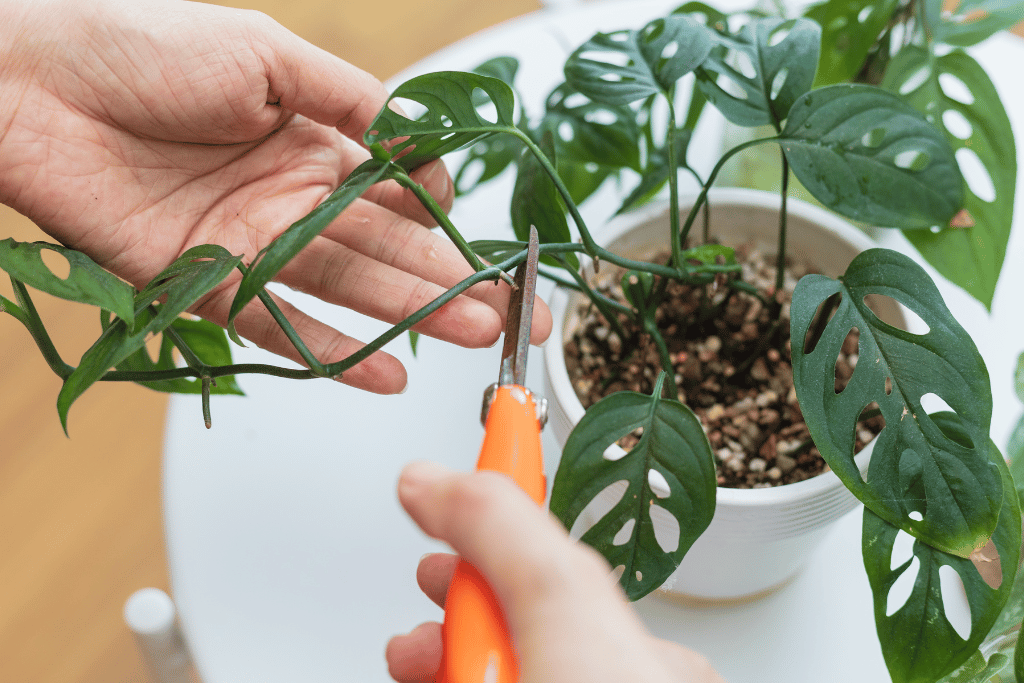
Are you a fan of Swiss Cheese Plants? If so, today’s your day! I’m about to show you how to make an entire family of these unique and funky plants. This DIY project involves propagating a swiss cheese plant using soil and plant cuttings. While it may seem unconventional, the end result is amazing. Would you like to learn how to propagate Swiss cheese plant? Let’s get into the details.
How to Propagate a Swiss Cheese Plant: 3 Deliciously Effective Methods
Alright, fellow cheeseheads, get ready to take some notes because I’m about to teach you not one, not two, but THREE ways to propagate a Swiss Cheese Plant. Are you excited? I know I am!
Method 1: How to propagate swiss cheese plant in water

When it comes to propagating a Swiss Cheese Plant, one of the easiest and most effective methods is propagating in water. Here’s how you can do it:
Step 1: Take a cutting
First things first, you’ll need to take a cutting from your existing Swiss Cheese Plant. Look for a stem with a few leaves and cut it just below a node (the point where the leaf meets the stem). Make sure your cutting is at least a few inches long.
Step 2: Prepare the cutting
Once you have your cutting, remove the leaves from the bottom few inches of the stem. You want to make sure there are no leaves submerged in the water, as they can rot and cause the cutting to fail.
Step 3: Place in water
Fill a glass or jar with water and place your cutting in it, making sure the bottom inch or two is submerged. Keep your cutting in a warm, bright spot but away from direct sunlight.
Step 4: Wait for roots to grow
In a few weeks, you should start to see roots growing from the bottom of your cutting. Once the roots are a few inches long, you can transplant your new Swiss Cheese Plant into soil.
Congratulations, you’ve successfully propagated a Swiss Cheese Plant in water.
Method 2: Propagating Swiss Cheese Plant via Soil

If you prefer to propagate your Swiss Cheese Plant directly in soil, this method is for you. Here’s what you need to do:
Step 1: Take a cutting
Just like with the water propagation method, you’ll need to take a cutting from your existing plant. Make sure it has a few leaves and cut it just below a node.
Step 2: Prepare the cutting
Remove the leaves from the bottom few inches of the stem and dip the end in rooting hormone powder. This will help stimulate root growth.
Step 3: Plant in soil
Fill a small pot with well-draining soil and make a hole in the center. Gently place your cutting in the hole and pat the soil around it. Water your cutting thoroughly and place it in a warm, bright spot.
Step 4: Keep soil moist and wait for roots to grow
Make sure the soil stays moist but not too wet, and wait for roots to grow. In a few weeks, you should start to see new growth, which means your cutting has successfully rooted.
Method 3: Propagating Swiss Cheese Plant via Air Layering

For the daring and adventuresome, air layering is an advanced technique to try. Here’s what you gotta do:
Step 1: Choose a branch
Select a branch on your Swiss Cheese Plant that you want to propagate. Make a small cut in the bark of the branch about six inches from the tip, and remove the bark from around the cut.
Step 2: Apply rooting hormone
Apply rooting hormone to the exposed area of the branch, making sure to cover it well.
Step 3: Wrap with moss
Wrap damp sphagnum moss around the exposed area of the branch and cover it with plastic wrap. Secure the plastic wrap in place with twist ties.
Step 4: Wait for roots to grow
Check the moss every few weeks to make sure it stays moist. In a few months, you should start to see roots growing from the exposed area. Once the roots are a few inches long, cut the branch below the rooted area and plant it in soil.
There you have it, cheeseheads – three different methods on how to propagate monstera Swiss cheese plant. Choose the one that works best for you and enjoy watching your little plant babies grow.
How to Repot a Propagate Swiss Cheese With Plant New Root Cutting
Repotting a propagated Swiss Cheese Plant with new root cuttings is an essential step to ensure the plant’s continued growth and development. Here’s the complete process:
Step 1: Choose a pot
First things first, choose a pot that’s one size larger than the one your propagated Swiss Cheese Plant is currently in. Make sure the pot has drainage holes to allow excess water to escape.
Step 2: Prepare the pot
To ensure proper drainage, add a layer of gravel or small rocks to the bottom of your pot. Top it off with fresh potting soil, leaving enough room for your plant. Voilà! Your pot is ready for planting.
Step 3: Remove the plant from its current pot
Carefully remove your propagated Swiss Cheese Plant from its current pot. Gently loosen any roots that may be tangled or circling the root ball.
Step 4: Inspect the roots
Take a close look at the roots of your plant. If they appear brown or slimy, they may be rotting and should be trimmed off. Healthy roots should be white and firm.
Step 5: Plant the new root cutting
If your propagated plant has already rooted in water or soil, carefully plant it in the center of the new pot, making sure the roots are spread out evenly. If you’ve air-layered your plant, make sure the rooted area is covered with soil.
Step 6: Fill the pot with soil
Add more potting soil around your plant, making sure to gently press down on the soil to remove any air pockets. Leave enough room at the top of the pot to water your plant.
Step 7: Water your plant
Give your newly repotted plant a good drink of water, making sure the soil is thoroughly moistened. Allow excess water to drain out of the bottom of the pot.
Step 8: Place in a suitable location
Find a suitable location for your newly repotted plant. Swiss Cheese Plants thrive in bright, indirect light, so find a spot that gets plenty of natural light but is not in direct sunlight.
Step 9: Care for your plant
Wow! You’ve just potted your new propagated Swiss Cheese Plant. Now all that it needs is some tender loving care from you. Give it a good watering when the top inch of soil feels dry and give it some fertilizer at least once a month during its growth season. Witness how quickly your plant grows!


